Free Logic Pro mixing template and how to use it
- Orçun Ayata
- Oct 12, 2022
- 8 min read

Updated: Dec 23, 2025

When I first started mixing, I was always trying new things and techniques, and the mixing process was always different, even though some things were always the same. I was against mixing templates because I thought it kills creativity, but it’s the opposite. Now I regularly update my Logic Pro mixing template to my needs, and I update it when I buy a new plugin, and I use it for every single mixing project.
For example, I always had to change the sample rate, control bar display, and ruler settings. After some time, I started using bus groups on my mixes, and I realized that I was spending a lot of time preparing my mixing projects and trying to get the best reverb sound for the material.
I don’t think it kills creativity anymore because I can always fine-tune things to get the best for the project. Having some sort of toolbox ready for using it actually generates creativity because I don’t have to worry about routing some channels to groups or creating a new bus for a delay effect and naming it. This little stuff takes time, and it kills creativity.
To the long word short, if you’re not sure about using templates for mixing, please don’t worry about it. It will help you a lot, and it won’t make you a lazy person. On the contrary, it will add value, giving you the creative time you need.
Control bar and the ruler

Sample rate
The most unnecessary thing for me is to change the settings of this control bar and the ruler. Because it’s ALWAYS the same. Some people don’t have any preferences and use them as it is, but I find them so helpful. So I always have the same setting on my mixing and production projects.
I always work on 48 kHz because I want to have a little headroom. And I feel kind of premium when I’m working on 48 kHz. (It’s just how I feel though. It doesn’t represent any scientific relation.) So I have to constantly change the sample rate settings from the project settings section before I start working. I have this in my template, so I always have a quick look at the sample rate of my project, and I can always change it quickly, which I use a lot.
I want to see bars and beats, and also the timing, but I don’t want to see the locator because I haven’t used it even for a single time in my life. On the other hand, maybe it can be helpful while editing, which I don’t do often. So, if you’re an audio editor, consider changing this feature.
Tempo and the key
I always want to see the tempo and the key of the song. Because I change them a lot, and I forget them after a while. Also, you should set your tempo so your reverb and delay effects can work based on your tempo. And this way, you don’t have to worry about if that delay effect ruins your groove or not.
CPU usage
I always want to see the CPU usage so that I can be careful about my plugin usage. Some plugins can drain your CPU, so you have to keep an eye on this. If it gets worse, I try to freeze my channels to keep adding big plugins to the project.
Low Latency Mode
I don’t use Low Latency Mode on my mixing projects much, but you don’t know when you need to record something on it. Sometimes I have to figure out something, so I open a piano plugin to play with the song, and once in a while, I record extra back vocals.
Also, some artists want to hear the song like it’s almost finished, so I have to mix while we’re producing and recording. Low Latency Mode is like a god to me on those projects because it’s a lifesaver. Plus, I don’t use the monitoring of my audio engine because I want to use some effects on the vocal channel while recording. You can do this when Low Latency Mode is on.

Capture Recording
This one also saves lives. Sometimes I decide if there are any needs for a pad synth or some extra sub frequencies from a synthesizer. So I record them when I’m trying to find something while playing the song. And the last thing that I want is to forget what I just found. This setting continuously records what you play on your MIDI, so you can always find the best part of your improvisation. Some people can’t improvise freely, because the recording button is red, but this little hidden thing doesn’t feel like you’re under attention
Secondary Ruler

I discovered this one later, but I love it. Because it helps a lot to see the timing on the ruler with the bars. It was a habit when I was using Pro Tools, and I was missing that feature. So knowing that it’s there in my Logic Pro mixing template feels good.
The Bus Groups
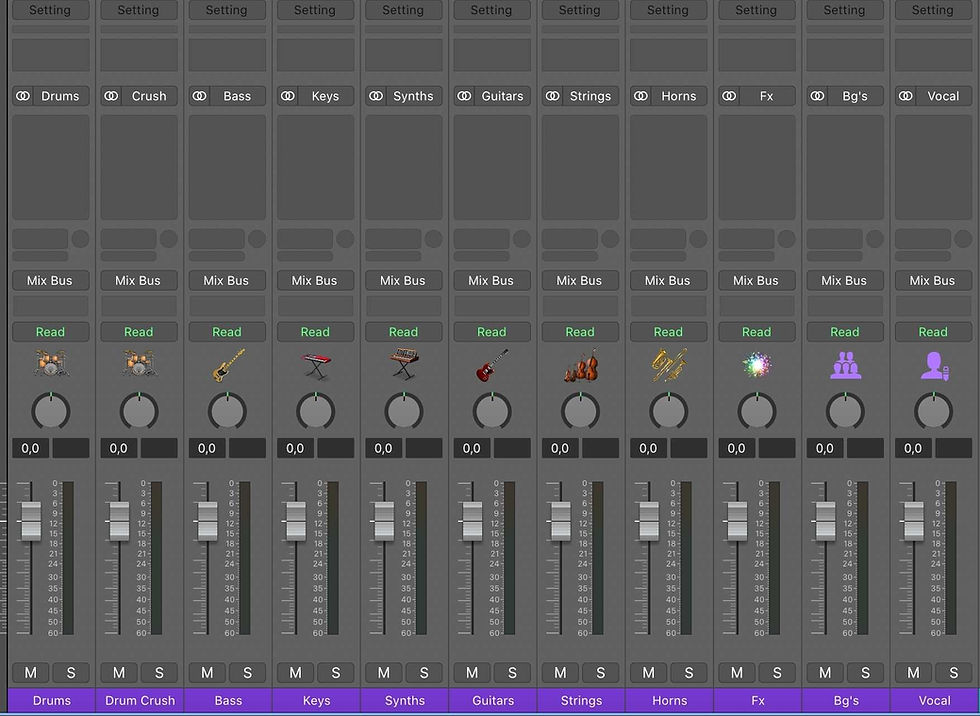
I always think of the channels in groups because it helps to understand the song. For example, when you download a 100 channels multitrack file and import it to your mixing project, it can be scary at first. But when you realize it’s just some drums, basses, different kinds of synth sounds, the same guitar part with three different mic settings, 30 different back-vocal options, and a couple of other channels for the lead vocal, you realize that it’s not that scary.
Also, you can process the same kind of sounds together if you use those bus groups. For example, I always tend to compress the drums together to get the most energy out of them. Therefore, I have to route all of them to a bus group. Having that group from the beginning is perfect for me. The bus routings are on the second page of the buses, so your primary bus names can stay the same. You can see it below:

Set the bus groups from the beginning of a mix project, and delete the unnecessary ones. And you’re ready for the creative time.
Drums group
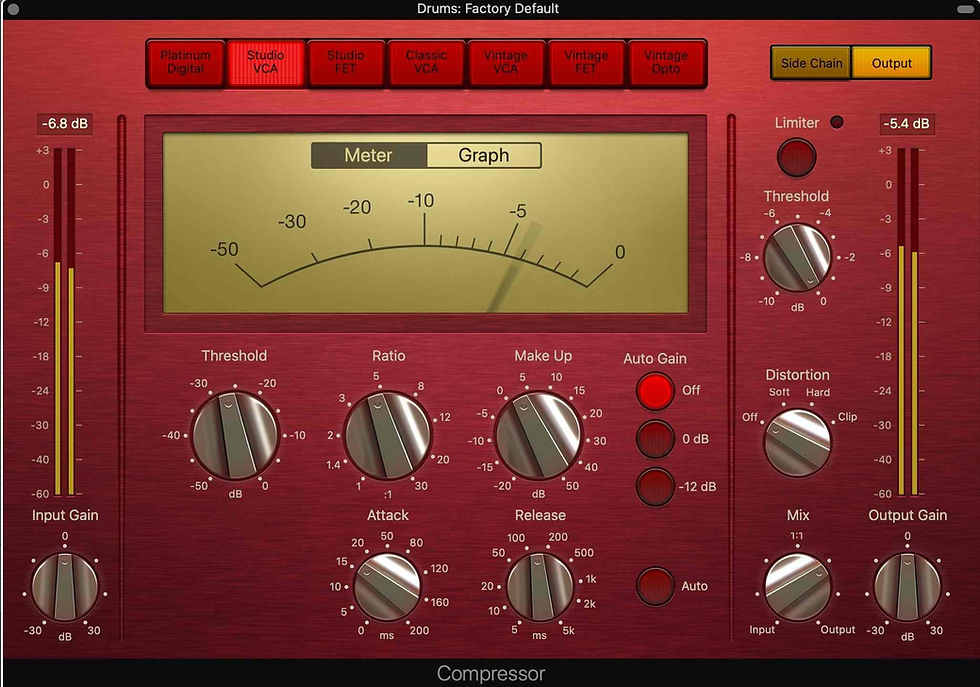
If I always tend to compress the rhythm elements together, why wouldn’t I put a compressor there? So this is why I put a VCA type compressor on the drum bus group. You can always tweak it to your liking, and I encourage you to do so because every song is different. But if you want energetic drums, this compressor will help you a lot. Dial the threshold where it compresses around 5 dB, and you’re good to go.
Drums crush group
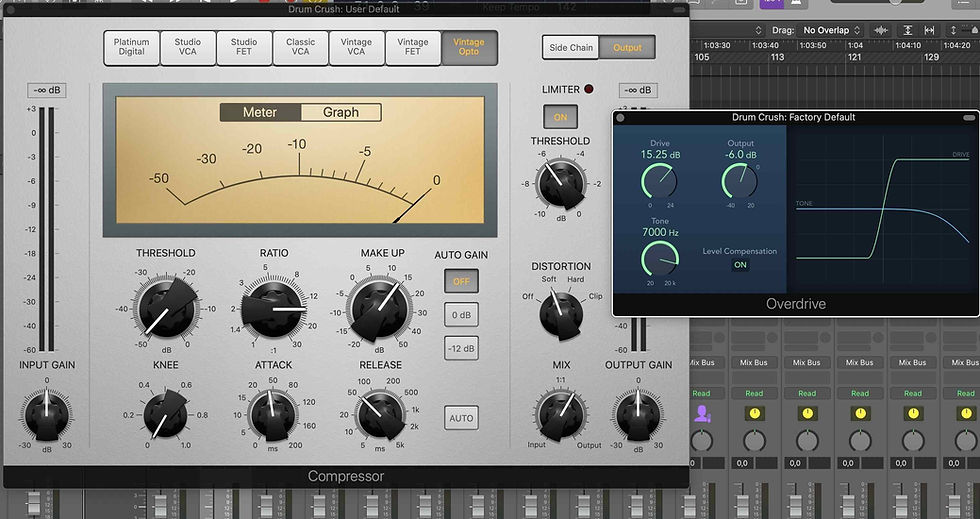
Sometimes I want a big, powerful sound from drums. When I want that, I use the Drum Crush bus. It compresses the signal to hell and adds some distortion to make it even more powerful. When you hear it alone, it doesn’t make sense at all, but it makes sense when you add it to the mix gently. I put there a compressor and an overdrive plugin, but you can always use its variations.
I don’t use specific plugins on any other bus group, but you can always add your go-to plugins on them and update the mixing template. For example, if you have something like a tape machine, you can add it with your favorite settings on every bus group, so you can always reach them with just a click. Then, you can start mixing with those plugins bypassed, and you can open them when you need.
Mix Bus
There is a stereo out bus; why would I use a mix bus? Good question. I use it for a couple of reasons. First of all, you can’t send the stereo out channel anywhere. Sometimes I need to send the whole mix to another bus group to parallel process it, or I can put some weird effects on it and dial with the mix. So you can do that with the Mix Bus group.
Also, I always use a monitoring plugin on my stereo bus, which decreases the volume. I don’t see the real numbers because of that. I always keep an eye on my mix bus, and I put my limiter on the stereo out in the Logic Pro mixer when I need it.
So, the groups work like this: the channels routes to bus groups, and the bus groups routes to mix bus. Then the mix bus goes to stereo out.

I realized that I almost always tend to use a compressor on my mix bus to get the most energy from the mix, so I put a compressor on the mixing template. You have to listen to the song and dial the settings of the compressor to your likings. The best way to do this is to take the threshold all the way down to where it compresses around -10 dB. And change the attack and release parameters there. When you find the best settings for your mix, take the threshold back. There is no rule for that, but around 3 to 4 dB will be nice. I also use the mix knob, so if you use it like how it is, you will do parallel compression. 75% of your mix will be compressed, and 25% will be untouched.
The effect buses

And we came to the fun part, the effects! I have too many buses ready for most of the situations. Those effects are enough to give me what I need quickly, but I always edit them later. For example, when I need some reverb for the lead vocal at the beginning of a mix, I send it to a bus in my mixing template, and I decide if it’s okay or not. If it sounds okay, I don’t go into details and work on it till I lose the big picture. I want to mix the song as fast as possible because I don’t want to lose my flow. Details always come later in the mix for me. This Logic Pro mixing template lets me do this easily.
Reverbs
We have small, medium, plate, long, big, and a massive reverb on the mixing template. Every one of them has a different pre-delay and decay time. Small and medium are room reverbs; long and big are hall reverbs. The plate is obviously a plate, and it’s kind of between medium and long reverb. It has a different character, and I mainly use it on guitars and the percussive sounds. When I want to replicate a room, I use the small reverb. When I want to take everything in similar places, I use medium reverb. When I want to use the reverb as an effect, I tend to use long, big, and massive ones. Every one of them has EQs that are set, so you can be sure that those effects won’t make your mix muddy. But you can always edit or put an EQ after them.
Delays
We have a half note, quarter note, eighth note, and a slap delay. Echo is also an eight-note delay, but it has a longer feedback time and a reverb, which I mostly use on synths or guitar solos. And lastly, we have a doubler effect. You can use it on the lead vocal gently to give it more power and width.
Your effects on different buses, so you can send those effects to each other. Be creative and do whatever you want with them. For example, I always send delays to reverbs, so they go back in the mix. But I know you can be more creative than that.
How to import the free Logic Pro mixing template
That’s it. You can download the free Logic Pro Mixing Template here. To see it in the templates section when you open Logic Pro, drag it to users -> your username -> music -> audio music apps -> project templates folder. Please let me know if you have any questions, or issues with it. Happy mixing! :)


I can’t download anything template
Informative from the first word….ive been struggling for a while finding that sweet spot……the way theses guys deliver info, breaking it down…..it’s all starting to make sense now,…..
Definitely interested in your production courses….Great work 👌🏾👌🏾C West